For the epoxy floor to have a good surface finish and aesthetic effect, Weifang floor paints for construction and maintenance are recommended as follows:
First, the construction environment:
1. Base surface moisture content: When it is more than 6% , non-water-borne epoxy floor can not be constructed; 2. Humidity in the air: The construction should be stopped at more than 85% ; 3. Construction temperature: less than 5 °C should use special formula.
Second, the construction method:
Surface grinding, crack repair → epoxy primer → scrape epoxy mortar layer → epoxy putty → epoxy paint layer → epoxy cover layer
Third, maintenance requirements:
1. Do not abuse the machine . Try to avoid excessive knocking on the ground. Do not hit the ground with very heavy or hard objects. Unless necessary for work, avoid frequent unnecessary wear. Especially for the ESL floor, in order to maintain its smoothness, beauty and appearance, special attention should be paid to avoiding traffic such as steel wheels; do not have heavy traffic and loads, and avoid contact with the ground to avoid scratches.
2. Surface cleaning , epoxy floor surface cleaning method is simple, generally scrubbed with water. If the stains are washed clean, use a cleaning agent, industrial degreasing agent, detergent, etc., and then rinse with water. For quite stubborn stains, mechanical cleaning methods can also be used, but do not put pressure on the ground, wear too much to affect the leveling and luster of the ground.
3. Avoid chemical pollution
 4. All personnel entering the workshop must change their shoes ( so as not to scratch the ground when the mud is thrown into the workshop );
5 , all hardware: such as iron chairs, iron tables, iron shelves, etc., must be wrapped with soft plastic or rubber feet to avoid scratching the ground during use ;
6. When cleaning the floor, please use a soft mop or a wet or dry vacuum cleaner, which can be cleaned with water or detergent, but please note that the floor is slippery ;
7, Please use rigid or elastic rubber wheels for the wheels of the carts and carts, and use them separately inside and outside the workshop ;
8, If it is used for a long time, it will cause wear or scratches, and a small area can be repaired. If the area is large, it is recommended to re-roll it once .
Weifang Nadi Floor Engineering Co., Ltd. Main: Weifang epoxy floor paint , epoxy floor paint, epoxy mortar floor paint, epoxy self-leveling floor paint, corundum wear-resistant floor, concrete seal curing agent, etc. Hardened floor paint. To undertake all kinds of workshop floor, parking lot floor and wear-resistant floor engineering
Contact: Manager Zhou
Contact information: 13396364799 Â 0536-7361556
Company website:
Instruction Manual
1. Features
Clock display, 10 sets of adjustable timed power control, randomized power control, manual switch and optional DST setup.
2. First time charging
This timer contains a rechargeable battery. It is normal that the new/old model runs out of battery if it wasn`t being charged for a long period of time. In this case, the screen will not turn on.
To charge : simply plug the timer to a power outlet. The charging time should take at least 15 minutes.
If the screen doesn`t light up or displays garbled characters, simply reboot the system by pressing the [RESET" button.
3. Set clock

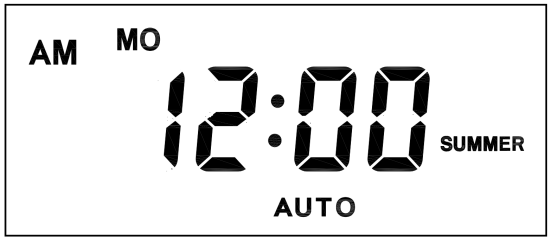
Hold [CLOCK" button and [WEEK" button to adjust week.
Hold [CLOCK" button and [HOUR" button to adjust hour.
Hold [CLOCK" button and [MINUTE" button to adjust minute.
Hold [CLOCK" button and [TIMER" button to select 12 hour/24 hour display.
Hold [CLOCK" button and [ON/AUTO/OFF" button to enable/disable DST (daylight-saving-time).
4. Set timer
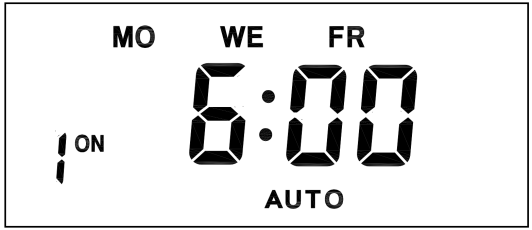
Press [TIMER" button, select and set timer. Setting rotation : 1on, 1off, 2on, 2off, ...... , 10on, 10off.
Press [HOUR" button to set hour for timer.
Press [MIN" button to set minute for timer.
Press [WEEK" button to set weekday for timer. Multiple weekdays can be selected. ex: if selected [MO", the timer will only apply on every Monday; if selected [ MO, WE, FR", the timer will apply on every Monday, Wednesday and Friday.

Press [RES/RCL" button to cancel the selected on or off timer. The screen will show "-- -- : -- --" , the timer is canceled.
Press [RES/RCL" button again to reactivate the timer.

When timers are set, press [CLOCK" to quit timer setting and return to clock.
5. Random function

Press [RANDOM" button to activate random function, press again to cancel function.
System only runs random function when [AUTO" is on.
Random function will automatically start the timer from 2 to 32 minutes after the setting.
ex : if timer 1on was set to 19:30 with the random function on, the timer will activate randomly between 19:33 to 20:03.
if timer 1off was set to 23:00 with the random function on, the timer will activate randomly between 23:02 to 23:32.
To avoid overlapping, make sure to leave a minimum of 31 minutes gap between different sets of timer.
6. Manual control
Displayed features:
ON : socket turns on.
OFF : socket turns off.
AUTO : socket turns on/off automatically via timer.
Manual ON setting
Press [ON/AUTO/OFF" button to switch from [AUTO" to [ON".
This mode allows socket of the device to power up. Power indicator will light up.
Manual OFF setting
Press [ON/AUTO/OFF" button to switch from [AUTO" to [OFF".
This mode turns socket of the device off. Power indicators will turn off.
7. Electrical parameters
Operating voltage : 230VAC
Battery : NiMh 1.2V
Power consumption : < 0.9W
Response time : 1 minute
Power output : 230VAC/16A/3680W
Q&A
Q: Why won`t my timer turn on?
A: It`s out of battery, you can charge the timer by plugging onto any power outlet. Charge the device for at least 15 minutes. Then press [RESET " button to reset the device.
Q: Can I set seconds of the timer?
A: No, the smallest time unit is minute.
Q: Does my timer keeps old settings without being plugged onto a power outlet?
A: Yes, the timer has an internal battery, it allows the timer to save settings without a power outlet.
Q: Is the battery rechargeable?
A: Yes, the battery is rechargeable. We recommend to charge it for 4 hours so the battery is fully charged.
Q: Does the timer needs internet connection?
A: The timer does not need internet.
Q: Does the screen have back light function?
A: It doesn`t support back light.
Digital Timer Socket, Timing Switch Socket, Electronic Timer Socket, Timer Socket
NINGBO COWELL ELECTRONICS & TECHNOLOGY CO., LTD , https://www.cowellsockets.com