Give an ordinary gift basket a professional look with a dash of ProⓇ
It’s that time of year! Easter, baby showers, bridal showers, weddings, you name it there’s a gift basket for the occasion.
If you’re making any gift baskets this year, UGluⓇ is going to be your best friend!  Check out how easy it actually is to make gift baskets with just 6 simple steps that anyone can follow!
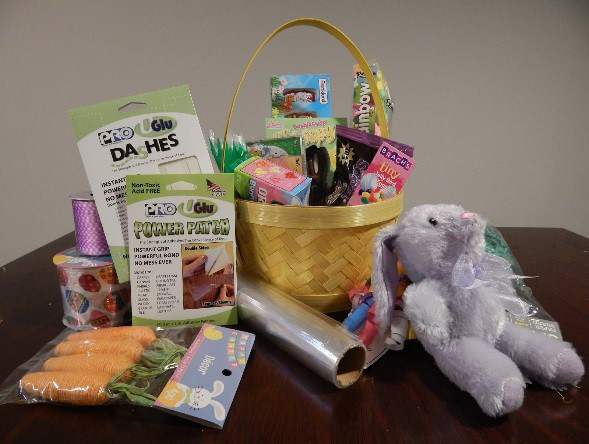
1. Gather and layout all your materials.
You have to see what you’re working with. See how many items you have, the various sizes and see if you have a good variety of sized items.
Here’s what I used:
- Basket (I used a wicker basket, but any basket will do)
- Various sized treats
- Filler grass
- Foam bowls (at least 2)
- Cellophane
- Embellishments: decorative carrots, bows, and ribbons
- UGluⓇ
2. Build a solid base:
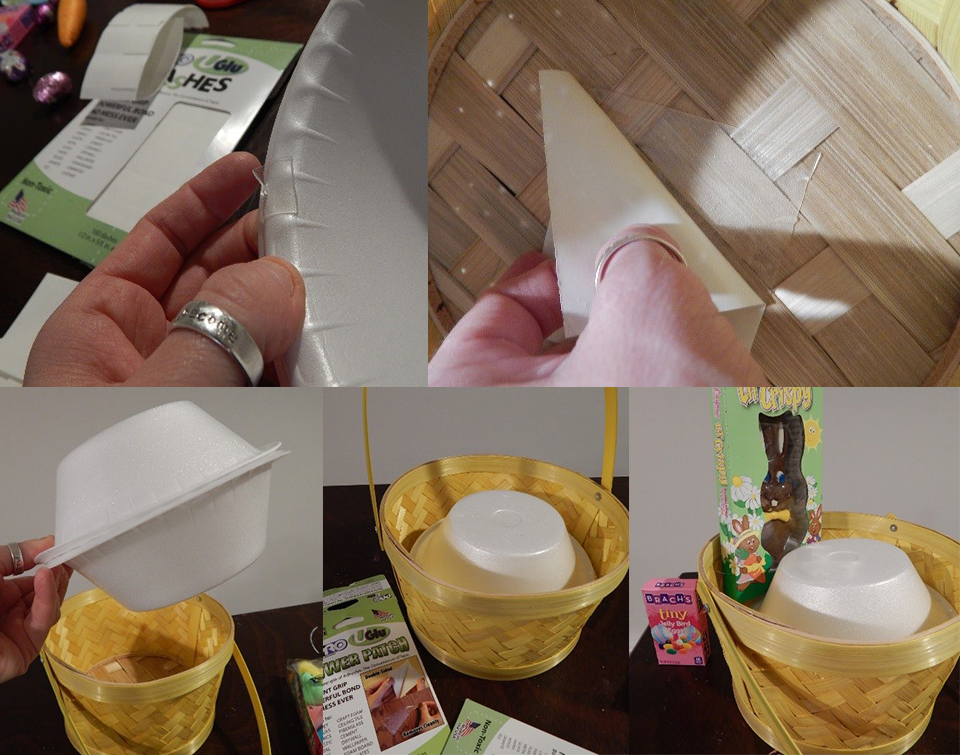
Build up the center of basket simply with foam bowls and UGluⓇ. I used 2 foam bowls stacked on top of each other to build up height. You want to build up the items so they are showcased not sunken in! I used UGluⓇ Dashes to hold the bowls together face to face, and a UGluⓇ Power Patch to secure the bottom of bowl to the inside of basket. By doing this, you are creating different levels within the basket to allow for an interesting and appealing display.
3. Prep it
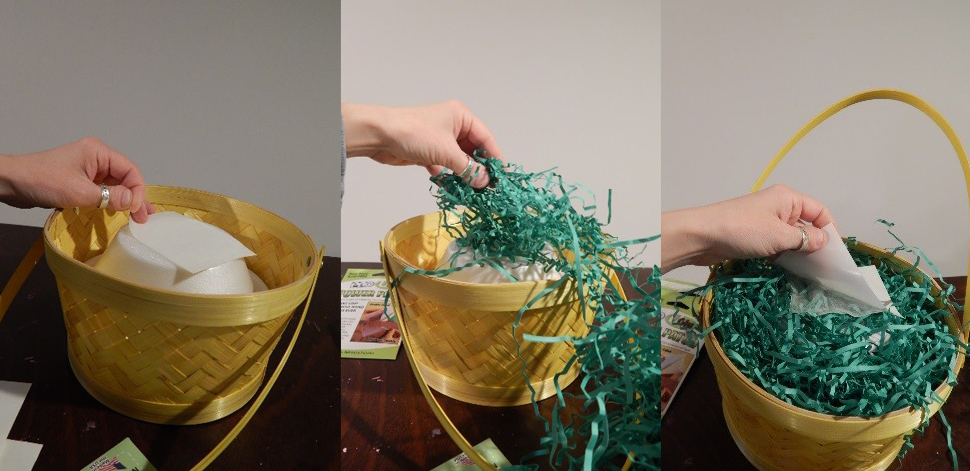
Add another UGluⓇ Power Patch to the top and maybe around the sides of bowl to stick your filler grass and scatter it around so your basket looks full. Make sure to save some for some extra “fluff†later.
4. Fill it up!
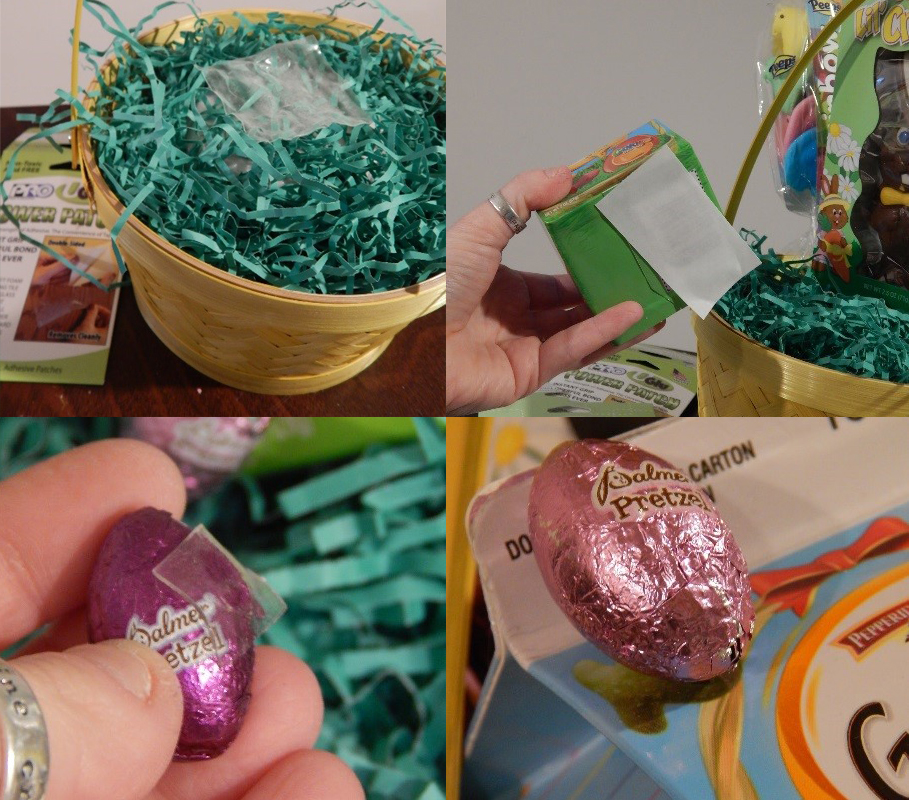
Fill with goodies…but keep in mind the “Florists rule†try to keep the items on display 1 ½ times taller than the container. This is why I used the foam bowls to add a taller base within the basket, to add dimension and height. Also, try to open any items that are packaged in multiples, because you can scatter them and make your basket appear fuller.
UGluⓇ is amazing for this step! I was able to use the UGluⓇ Dashes to affix the smaller items and the UGluⓇ Power Patches for the larger items. UGluⓇ is my go to for making gift baskets because it keeps everything put, but if needed I can remove it with a “simple twisting technique†and reposition the item without damaging the display item or the basket…truly a unique double sided tape!! UGluⓇ made it so easy for me to play around with the placement of my items if needed, but let me tell you these things aren’t going anywhere. If you need to ship out a basket, rest assured, your items will stay put!
5. Spin your basket
Spin your basket around. Make sure it is presentable from all angles. Looking good?? Notice how you can see all them items, nothing is buried or hidden. You can use UGluⓇ to stick your items directly in place and even hide or mask things that aren’t as appealing…such as the barcodes on the back of the packages.
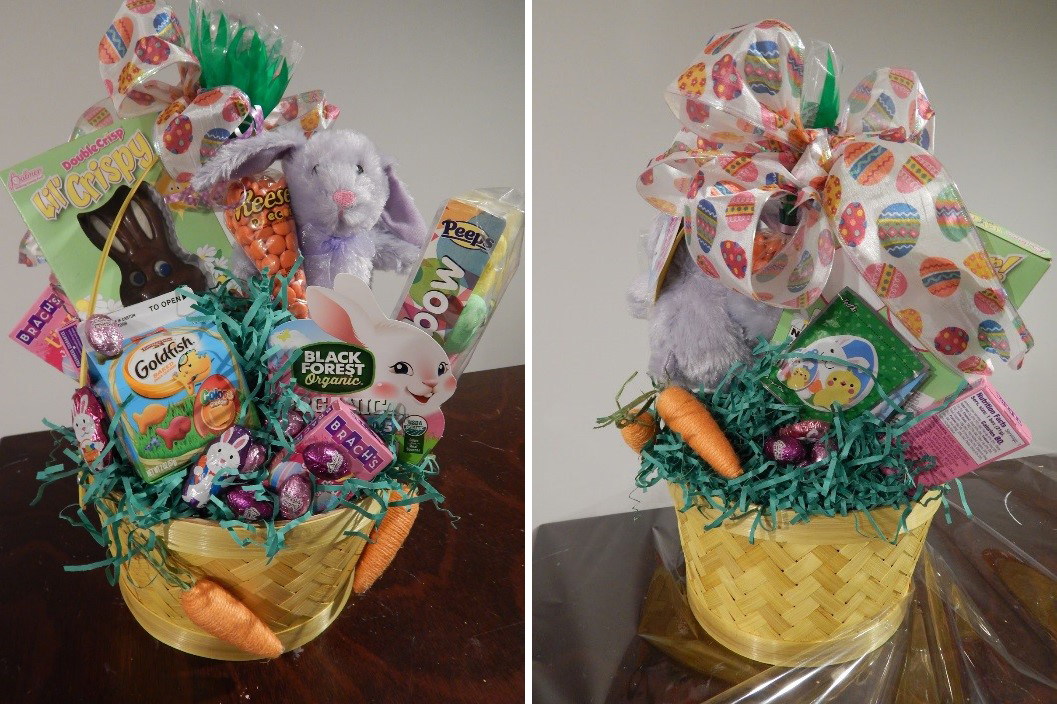
6. Wrap it up!
I cut a large piece of cellophane from a roll and was able to pinch the top and sides together with a single dash of UGluⓇ per side to help keep the wrapper in place. Thankfully UGluⓇ is transparent, so it will go unnoticed and will not distract from your design. Once all wrapped up you’re ready to go!
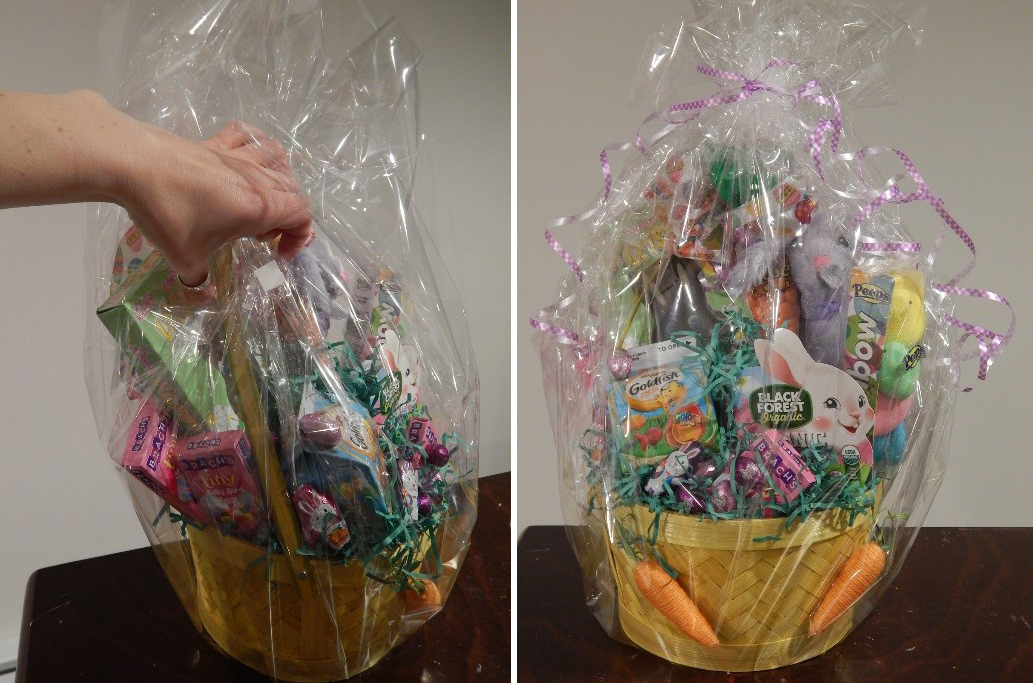
*Bonus Points!
Grab some bonus points by further accessorizing your gift. Can’t tie a nice bow? Or maybe just short on some ribbon? Try this HACK for BOWS MADE EASY!
P.S. I like to use wired ribbon for bows because it keeps its shape best.
1. I cut my left over ribbon into 3 pieces. 2 smaller ones of equal length (the loop part) and one about double the length (the tail).
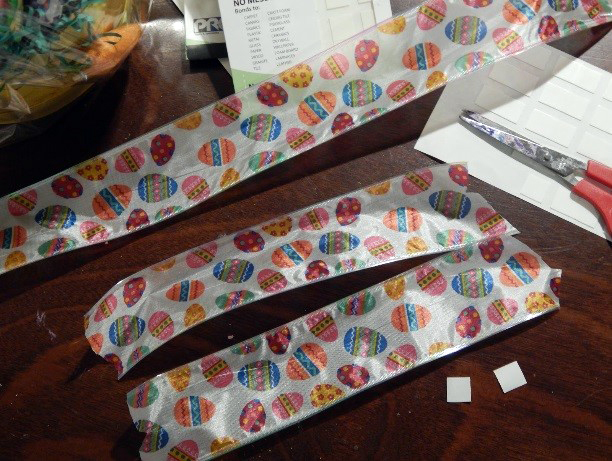
2. Loop the shorter pieces of ribbon ends together and affix with one UGluⓇ Dash.
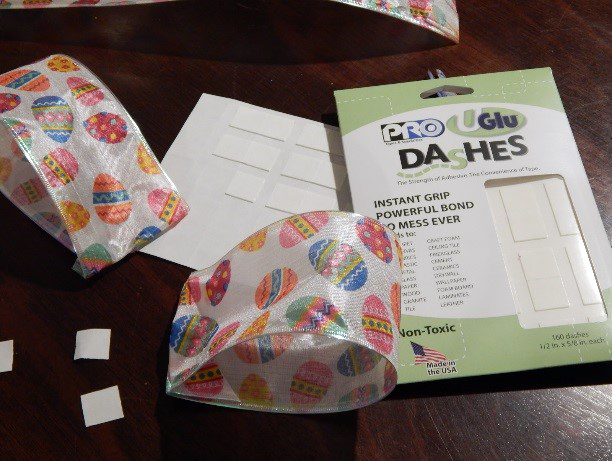
3. Find the center of the longer piece and tie on some curly ribbon (this is how you will attach the bow to your package). Add a UGlu® Dash to the base of each tail of the ribbon.
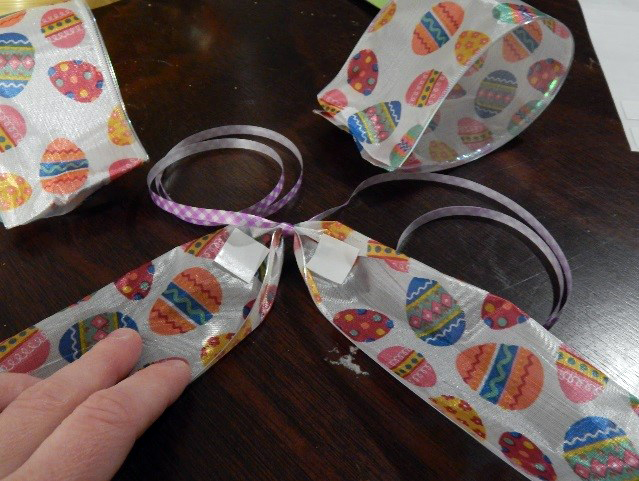
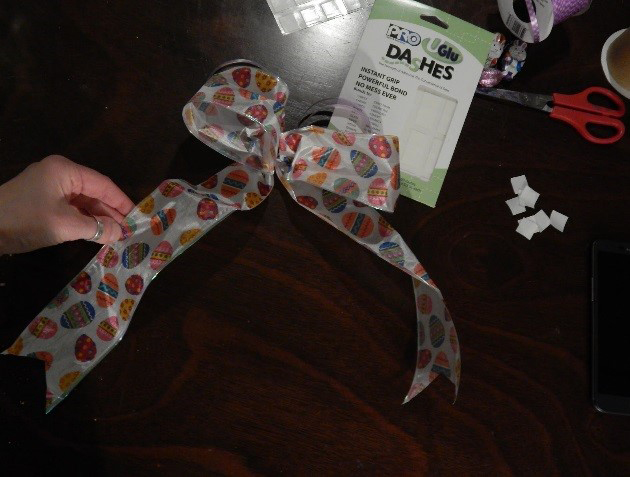
4. Peel back the liner of the UGluⓇ Dash and affix your loops right on either side. Use those ties to place bow perfectly onto your package! Viola!
Now that you have all the basic skills to create an awesome gift basket, don’t limit yourself to just a basket. A basket can be anything, an umbrella, a pail, a tote bag, and etcetera. If you can imagine it, you can create it! You can cater your basket to any person for any occasion! So think outside the box and get Gift Basketing!
Some Inspiration:
For the kids: a pail & shovel…fill with a beach towel, flip flops, sunglasses, candy, and a ball
For the “chefâ€: a crock pot…fill with wine, pasta, bottle opener, wine glass, and a cook book
For the beach bums: A cooler…fill with ice packs, hat, to go cup, sun block, and a towel
Your options are limitless!!
How to remove UGlu®
DADNCELL 1.5V AAA alkaline batteries are more suitable for long-lasting continuous discharge and high-performance power consumption equipment because of their unique internal component structure, coupled with better battery materials, improved power capacity and electrical performance, and the same model of DADNCELL 1.5V AAA alkaline cell capacity and discharge time, Alkaline battery capacity and discharge time are 4-7 times that of ordinary batteries, and the gap in power discharge performance at high and low temperature is even wider.
At present, all types of cells developed by DADNCELL Labs do not involve any heavy metals in production, are green and can be disposed of with domestic waste.
DADNCELL 1.5V AAA battery advocates a more comfortable and smooth power supply experience for household appliances. Alkaline zinc-manganese dry battery series is suitable for various common household electronic equipment instruments such as smart door locks, infrared thermometers, cameras, flash lights, razors, electric toys, instruments, high-power remote controls, Bluetooth wireless mouse keyboards, etc.
1.5V Lr03 Alkaline Battery,1.5V Lr03 Battery Suitable For Camera Razor,Long Storage Lifedouble A For Office Use,Lr03 Meters High Power Remote Control
Shandong Huachuang Times Optoelectronics Technology Co., Ltd. , https://www.dadncell.com